Crochet Cool Blue Summer Granny Square Poncho

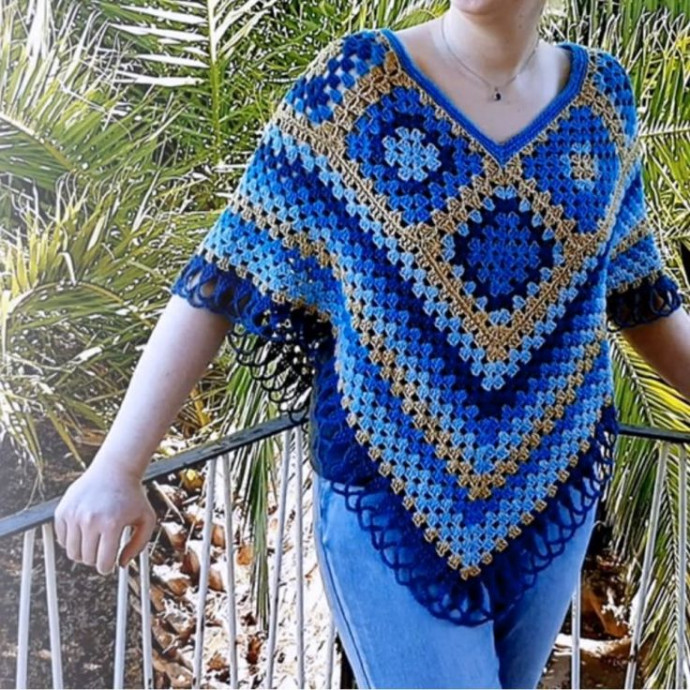
The Crochet Cool Blue Summer Granny Square Poncho is a delightful and stylish addition to your summer wardrobe! The beautiful cool blue color scheme radiates a refreshing and calming vibe, perfect for those sunny days. With its intricate granny square design, this poncho showcases a timeless appeal while keeping you cool and comfortable. Whether you pair it with jeans for a casual day out or layer it over a sundress for a breezy evening look, this poncho is sure to elevate your summer style with its unique and charming aesthetic.
Step-by-Step Instructions
Here, you’ll learn how to create a beautiful poncho using granny squares. This guide is provided to help you follow along easily with the pattern.
Materials Needed
- Yarn: Aqua, Baltic, Aventurine, Old Gold (all Echo Cotton, 100% cotton, hand-dyed by Nurturing Fibres)
- Hook: 4mm crochet hook
- Other Tools: Scissors, yarn needle
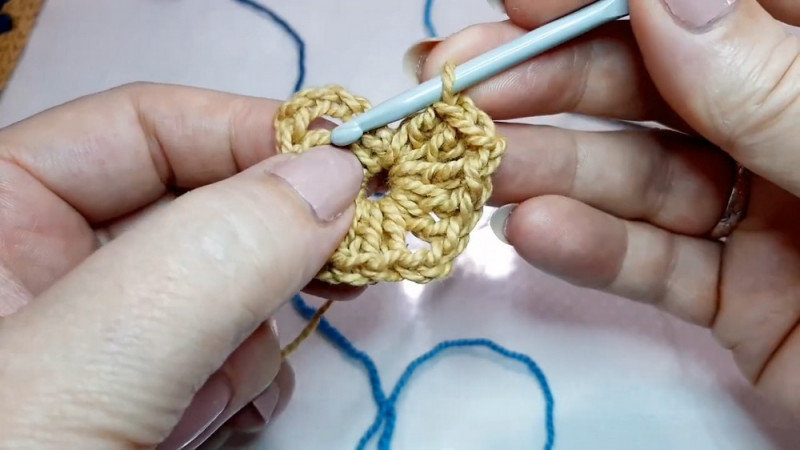
Step 1: Starting the Granny Square
Slip Knot and Chain: Use the Old Gold yarn to make a slip knot and then chain 5.
Form the Ring: Make a slip stitch in the first chain to form a ring.
Chain and Set Up Corners
- Chain 3 (counts as the first double crochet)
- Chain 2 (for corner space)
- Crochet 3 double crochets into the ring
- Chain 2 (corner)
- Crochet another 3 double crochets into the ring
- Chain 2 (corner)
Finish with 2 double crochets and slip stitch to the top of the chain 3.
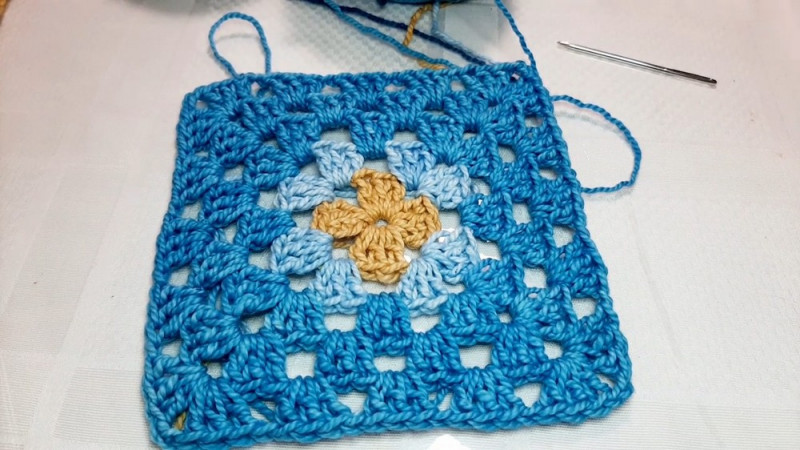
Step 2: Changing Colors and Building Rounds
Change Color:
- Introduce the Aqua yarn
- Make a slip knot and join in any corner with a single crochet
- Chain 2 to count as the first double crochet
Complete Corner
- Crochet 3 double crochets, chain 2, then another 3 double crochets in the same corner.
- Continue this process around the square.
Building Up Rounds:
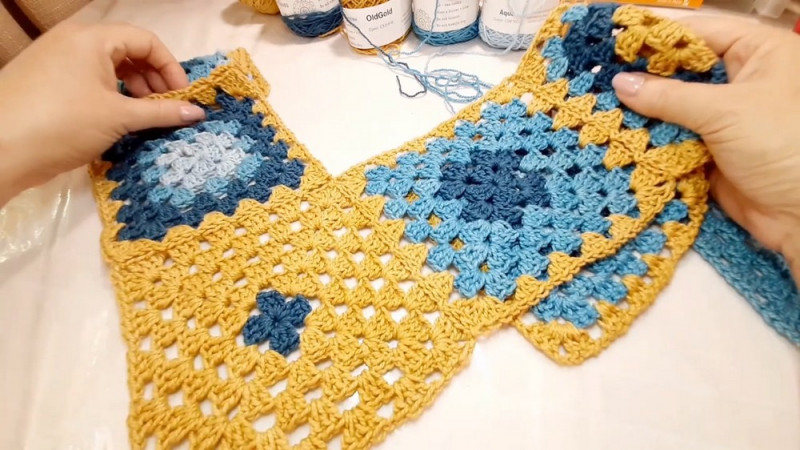
Step 3: Joining the Granny Squares
Make Multiple Squares
Follow the same steps to create multiple granny squares in desired colors.
Join Squares
- Use the “Join as You Go” method.
- Start by connecting in the corners.
- Work through side stitches with slip stitches while completing double crochets to ensure secure connections.
Step 4: Creating the Yoke
Determine Size:
Lay out the squares and check the required number of squares based on desired fit (6 or 8 square poncho recommended).
Join the Yoke Squares
Add extra squares as needed to form the yoke’s front and back.
Step 5: Adding the Neckline
Work Single Crochets
Join yarn on the shoulder.
Work single crochets in the back loop of every stitch around the neckline. Decrease as needed by working three single crochets together at the V of the neckline.
Create Multiple Rounds
Continue for three rounds to build a supportive neckline.