Crochet Mini Father Christmas: A Festive DIY Guide

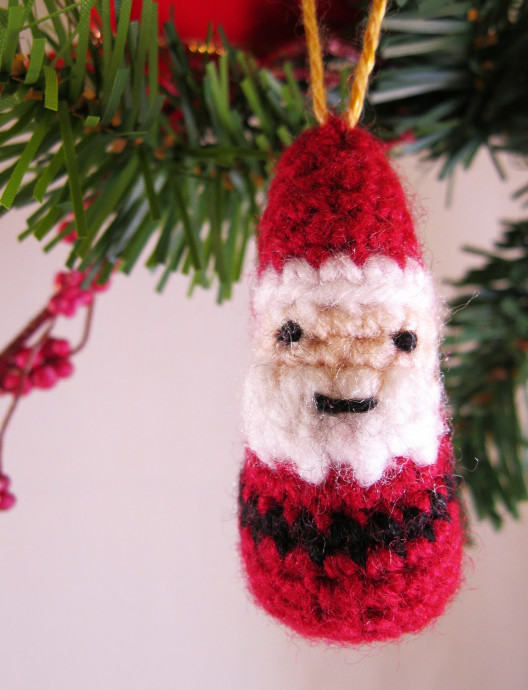
Crochet Mini Father Christmas is a delightful and charming handcrafted creation perfect for adding a festive touch to your holiday decorations. This tiny Santa Claus figure, intricately crocheted with care and attention to detail, brings a warm and whimsical feel to any space. Its petite size makes it ideal for adorning your Christmas tree, tabletops, or even gifting to a loved one. With its jolly red suit, fluffy white beard, and tiny sack of gifts, this adorable crochet Father Christmas is sure to bring a smile to anyone who sees it. So why not add a touch of handmade magic to your holiday season with this lovable and festive crochet creation?
Abbreviations
- ch = chain
- st = stitch or stitches
- sc = single crochet (US), double crochet (UK)
- dc = double crochet (US), treble crochet (UK)
- tog = together
- sc2tog = decrease by working two sc together
- bob = bobble (see special stitch instructions)
- BLO = work in back loop only
- FO = fasten off
General Instructions
Work in rounds unless otherwise stated and do not join rounds unless told to. Use a stitch marker to mark the start of a round - a small piece of different coloured yarn placed under the stitch at the start of the round will do. To start a round, you can use the magic ring method, but I prefer to ch 2, and work the appropriate number of sc into 1st ch. If you work the sc over the tail of yarn as well, you can use that to pull the hole tight.
When changing from one colour of yarn to another, work the stitch before the change until there are two loops left on the hook. Then use the new colour for the final yarn over hook and pull through. When you use two different colours on the same round, as you do for the face, carry the colour you are not using behind the one you are working with.
Work through both loops of stitches unless otherwise indicated.
Special Stitch Instructions
2dc Bob: Bobble Stitch for Beard
YOH, insert hook into next stitch, YOH and pull through stitch, YOH, pull through 2 loops, YOH, insert hook into same stitch, YOH and pull through stitch, YOH, pull through 2 loops, YOH, pull through all 3 loops on hook.
You Will Need
- Small amounts of double knitting or worsted weight yarn in red, white, black, and skin colour.
- A length of cotton yarn to hang as a decoration.
- Small amount of stuffing.
- 3.5mm (E) hook.
- Tapestry needle.
Pattern
Start with red yarn.
Round 1:
Ch 2, work 5 sc into 1st ch - 5 st.
Round 2:
2 sc in next st, sc in next 4 st - 6 st.
Round 3:
[2 sc in next st, sc in next st] 3 times - 9 st.
Round 4:
Sc in each st around – 9 st.
Round 5:
[2 sc in next st, sc in next 2 st] 3 times - 12 st.
Round 6:
Sc in each st around – 12 st.
Change to white yarn.
Round 7:
Sc in each st around – 12 st.
Change to skin colour yarn.
Round 8:
BLO Sc in next 6 st, change to white yarn, sc in next 6 st – 12 st.
Round 9:
Sc in next 6 st, change to white yarn, sc in next 6 st – 12 st.
Round 10:
Sc in next st, 2dc bob in each of next 4 st, sc in next st, change to red yarn, sc in next 6 st – 12 st.
Round 11:
Sc in each st around – 12 st.
Round 12:
2 sc in next 6 st, sc in next 6 st - 18 st.
Round 13:
Sc in each st around – 18 st.
Change to black yarn.
Round 14:
Sc in each st around – 18 st.
Change to red yarn.
Round 15 - 17:
(3 rounds) Sc in each st around – 18 st.
Round 18:
[Sc2tog, sc in next st] 6 times – 12 st.
Round 19:
Sc2tog 6 times – 6 st.
FO, leaving a length of yarn, and stuff. With the cotton yarn, sew a loop at the top of the head if you want to hang as a decoration. Using black yarn, sew eyes and a little mouth on top of the beard. Finish stuffing and sew up bottom neatly.