How to Make a Crochet Owl Keyring Amigurumi

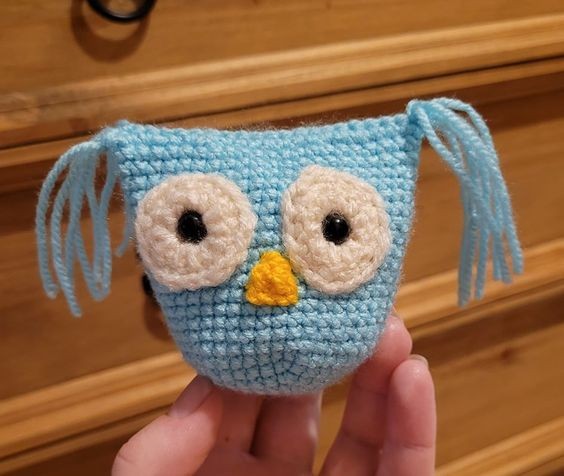
Imagine adding a touch of whimsy and charm to your keys with a Crochet Owl Keyring Amigurumi! This adorable little accessory combines the cozy art of crochet with the cuteness of an owl, making it a delightful addition to your everyday essentials. Whether you're looking to jazz up your keychain or gift a fun and handmade trinket to a loved one, this Crochet Owl Keyring Amigurumi is sure to bring a smile to anyone's face. Its intricate details and bright colors make it stand out, while its compact size ensures it's always by your side on the go. So why not add a dash of personality to your keys with this sweet and charming crochet creation?
Materials Needed
- 2.5mm crochet hook
- Scissors
- Your preferred colour DK yarn for body (approximately 10g)
- White DK yarn for eyes (approximately 2g)
- A bit of orange DK yarn for nose
- Safety eyes
- Keychain
- Filling
Abbreviations
SC – single crochet
INC – single crochet increase
DEC – single crochet decrease
SL ST – slip stitch
HDC – half double crochet
Crochet Owl Main Body
I am using light blue DK yarn for the body, but you can use your preferred colour.
Pattern Instructions
Round 1: 6 sc in magic ring [6]
Round 2: (inc) repeat 6 times [12]
Round 3: (1 sc in next st, inc) repeat 6 times [18]
Round 4: (1 sc in next 2 st, inc) repeat 6 times [24]
Round 5: (1 sc in next 3 st, inc) repeat 6 times [30]
Round 6: (1 sc in next 4 st, inc) repeat 6 times [36]
Round 7: (1 sc in next 5 st, inc) repeat 6 times [42]
Our crochet owl body after finishing round 7:
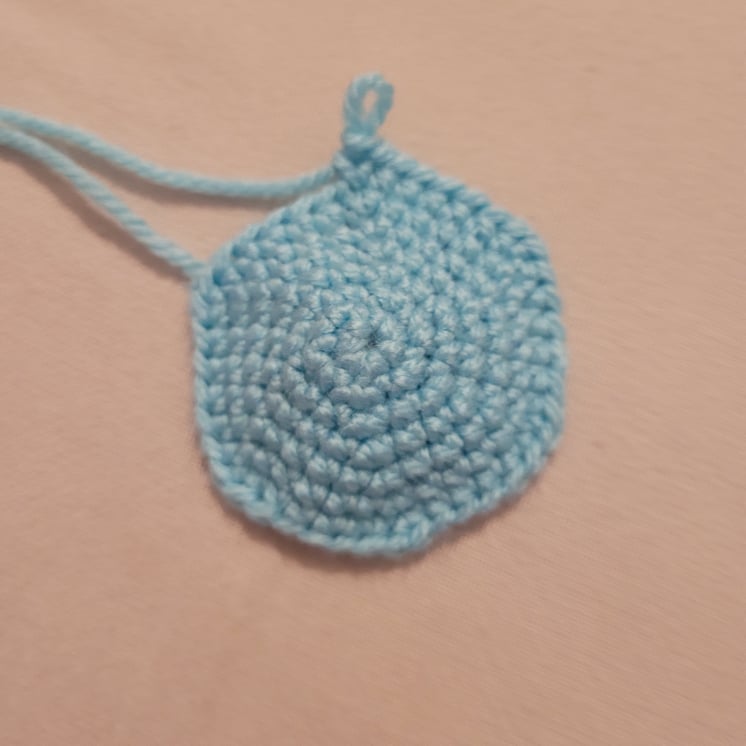
Round 8-22 (15 rounds): sc in every st [42]
Body after finishing round 22:

Finish off with sl st and leave a very long tail for later.
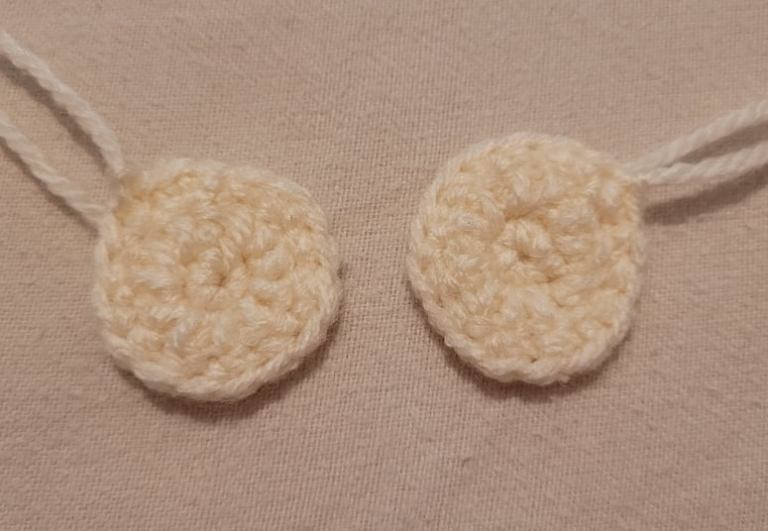
Crochet Owl Eyes
Make 2 eyes.
Round 1: 6 sc in magic ring [6]
Round 2: (hdc inc) repeat 6 times [12]
Round 3: (1 sc in next st, inc) repeat 6 times [18]
Finish off with sl st and leave a long tail for sewing to the body.
Finished eyes should look like this:
Assembly Instructions
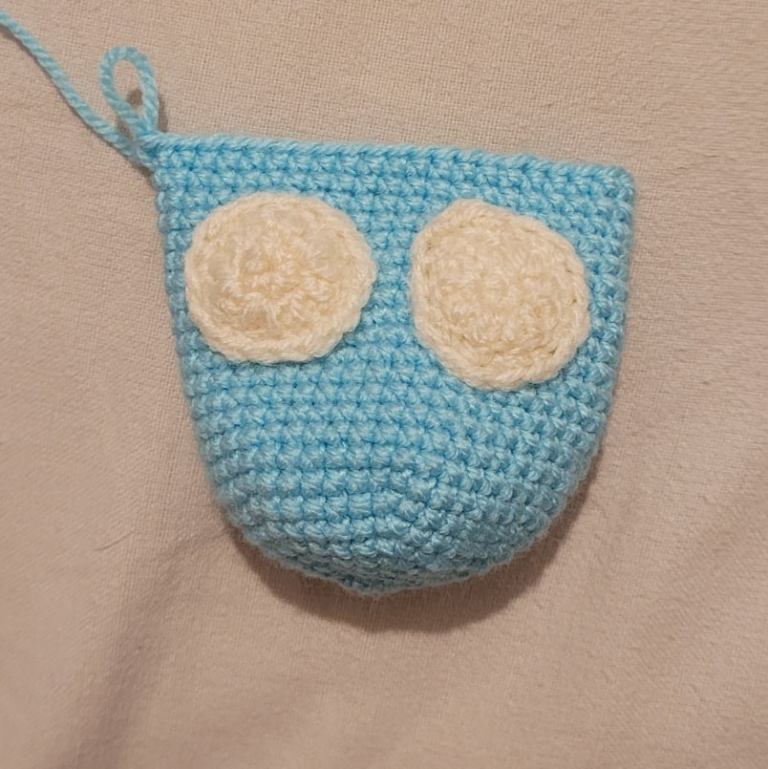
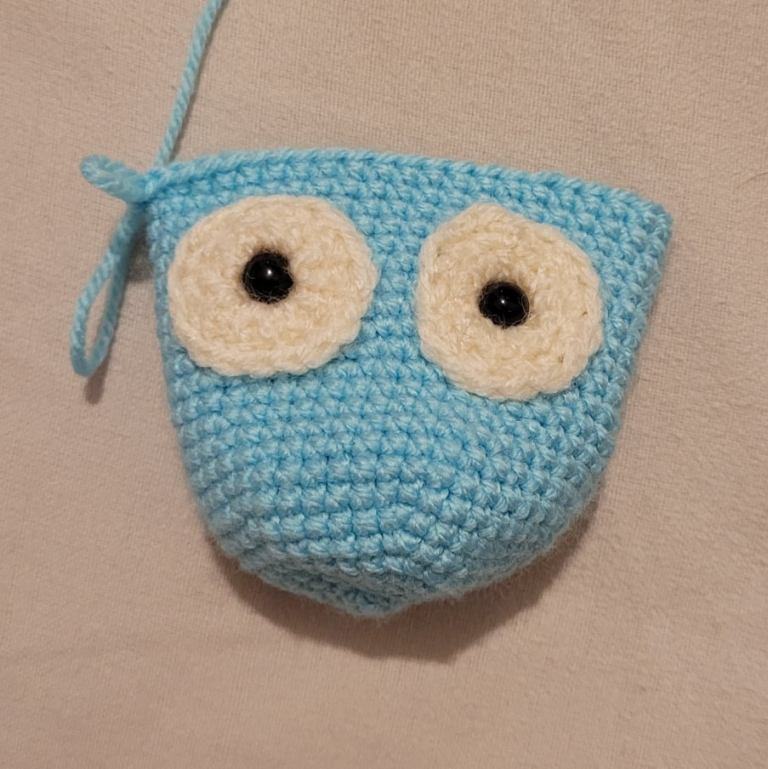
Step 1: Attaching the Eyes
Using a tapestry needle, attach eyes to the body. Place the eyes a few rows below the top and 2-3 stitches apart:
Step 2: Inserting Safety Eyes
Insert safety eyes in the middle of the white eyes:
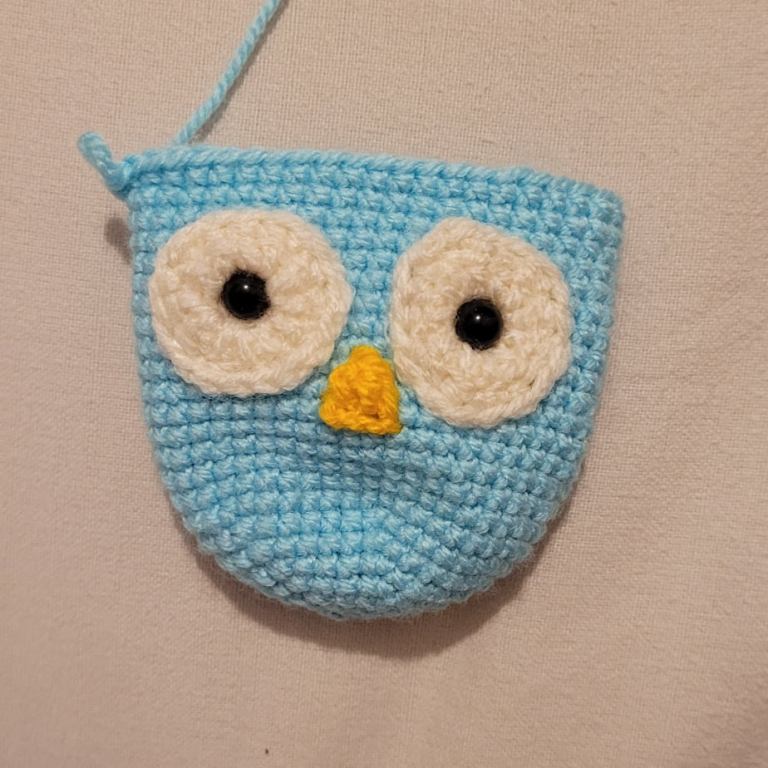
Step 3: Adding the Nose
Get a tapestry needle with orange yarn and embroider the nose in a triangle shape:
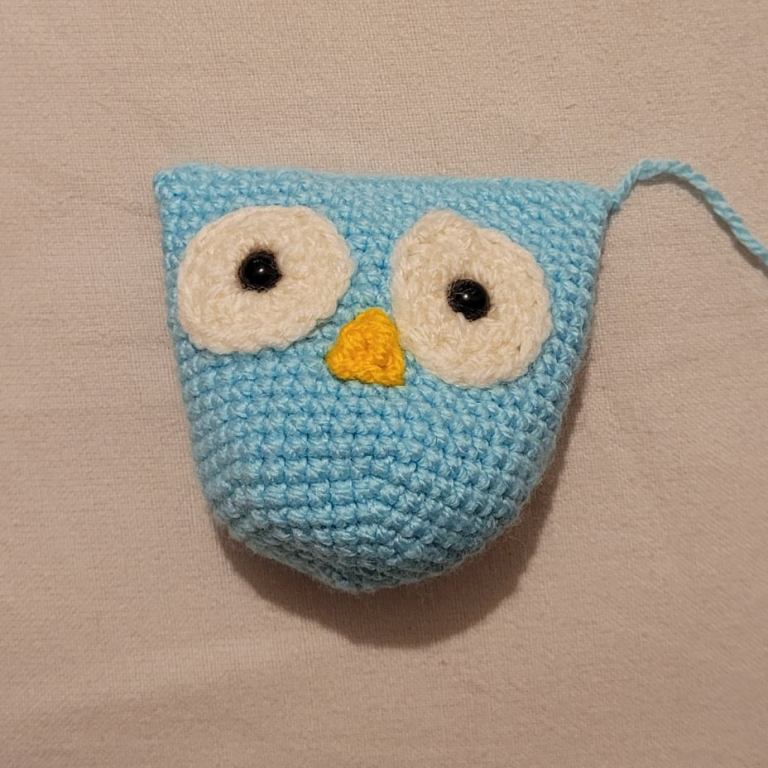
Step 4: Stuffing the Owl
After completing the eyes, use some filling to stuff the owl. When stuffed, slip stitch the entire top to close it off:
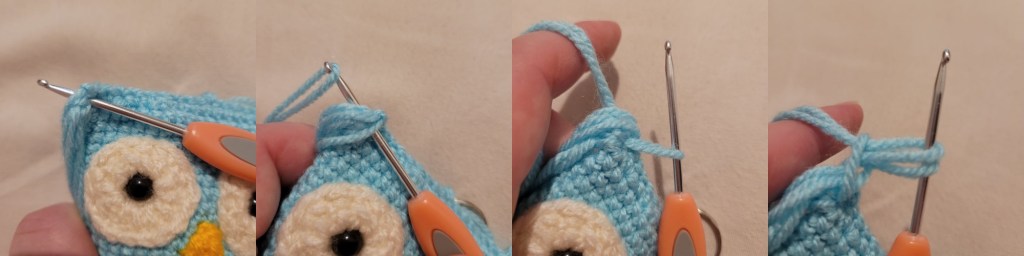
Step 5: Creating the Ears
Cut 10 strands of yarn about 20 centimeters long; 5 strands for each side. I wrapped the yarn around my book to make it easier.
Take your first strand, fold it in half, and slip stitch it through a top corner. Make 5 strands on each side:

Step 6: Attaching the Keychain
Finally, attach the keychain to the top of the crochet owl head, and we are done!