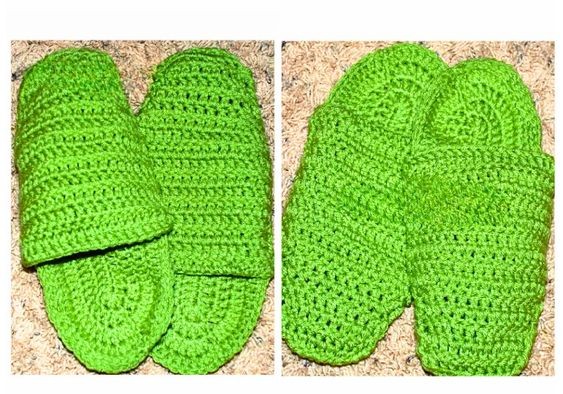
Handmade Crochet Slip-On Slippers for Comfort and Style

Crochet slip-on slippers are the perfect combination of comfort and style. These cozy footwear options not only keep your feet warm during colder months but also add a touch of charm to your loungewear. The beauty of crochet slippers lies in their versatility; they can be customized in various colors and patterns to suit your personal taste. Whether you prefer a classic solid color or a fun striped design, there is a crochet slipper pattern out there for everyone. These slippers are also great for gifting, as they show a personal touch and the effort put into creating them. So why not treat yourself or a loved one to a pair of handmade crochet slip-ons for the ultimate in comfort and style!
Supplies
- H hook
- Impeccable Green yarn
- Yarn needle
Abbreviations
- ch = chain
- sl st = slip stitch
- sc = single crochet
- dc = double crochet
- hdc = half double crochet
- dc2tog = double crochet 2 together decrease
Size Information
To fit Ladies’ shoe sizes:
- M (Shoe Size 6–7)
- L (Shoe Size 8–9)
The large fit me; my size is 8.5.
Starting Instructions
To Start, Ch 26 = Medium size, Ch 28 = Large size
Soles: Make 4, H hook
Instructions for Soles
RND 1: ch 26 (28)
1 dc in 4th ch from hook, 1 dc in each of next 21 (23) stithes, ch. 5 dc in last ch. Working into remaining loops on opposite side of foundation ch1, dc in each of next 21 (23) ch. 3 dc in last ch. Join with sl st in top of ch 3. (52 (56) dc)
RND 2: Ch 2. 1 dc in same space as last sl st., 2 dc in next dc, 1 dc in each of next 21 (23) dc, 2 dc in each of next 5 dc, 1 dc in each of next 21 (23) dc, 2 dc in each of last 3 dc. Join with sl st in top of ch 2.
RND 3: Ch 2. 1 dc in same space as last sl st, 2 dc in the next 3 dc, dc in the next 24 (26), 2 dc in the next 6 dc, dc in the next 24 (26) dc, 2 dc in the next 4 dc, sl st on top of the ch 2.
RND 4: ch 2, hdc in the next 33 (35) hdc, 2 hdc in the next 8 hdc, hdc in the next 30 (32) hdc, 2 hdc in the next 4 hdc, sl st on top of ch 2. Fasten off.
Take two soles together twice and sew them with yarn and a sewing needle.
Top of the Slipper
Make 2
H hook, Green yarn
Row 1: ch 19, dc in the 3rd chain from the hook and each ch across, turn - 17 dc
Rows 2–7: ch 2 (counts as first dc) dc in each dc across, turn - 17 dc
Row 8: ch 2 (counts as first dc) dc2tog decrease, dc in the next 12 dc, dc2tog decrease, turn, - 15 dc
Row 9: ch 2 (counts as first dc) dc2tog decrease, dc in the next 10 dc, dc2tog decrease, turn, - 13 dc
Row 10: ch 2 (counts as first dc) dc2tog decrease, dc in the next 8 dc, dc2tog decrease, turn, - 11 dc
Row 11: ch 2 (counts as first dc) dc2tog decrease, dc in the next 6 dc, dc2tog decrease, turn, - 9 dc
Rows 12–15: ch 2 (counts as first dc) dc in each dc across, turn - 9 dc *Repeat 4 times
Row 16: sc in the next 3 dc, dc in the next 3 dc, sc in the next 3 dc, - 9 stitches, fasten off (this is the end of the toe)
Assembly Instructions
Attach the top of the slippers by sewing the tops to the edge of the slipper, around the toe, and the other edge of the slipper. Fasten off and weave in the ends. The open part will be where you place your foot inside.